Windows 10 er en af de mest forventede versioner af Windows fra Microsoft. Selvom Windows 8 skabte en ny trend i Desktop OS-verdenen, havde den nogle problemer inden for design og ydeevne, der var hovedfokus for Microsoft i Windows 10. Så Windows 10 Final Build blev afsløret den 29. juli 2015 for Desktop as samt smartphones.
Det omfattede en masse ændringer ved at tage fejl i Windows 8 i betragtning. Faktisk er det en avanceret version af Windows, men der er stadig en række konsekvenser, der opstår hver dag med forskellige brugere.
En stor del af disse konsekvenser er de fejl, der kommer ud, når man prøver at udføre en bestemt opgave. Et antal mennesker har været igennem en fejlmeddelelse, mens de forsøgte at åbne forskellige software og browsere i deres Windows 10. Denne fejl kommer med en fejlmeddelelse, der siger, at applikationen ikke kunne starte korrekt (0xc0000005). Klik på OK for at lukke applikationen . Denne fejl opstår normalt med internetbrowsere, men den er ikke begrænset til disse. Ethvert program i Windows kan stoppe med at reagere på grund af denne fejl. Så det skal løses for at vende tilbage til den vigtige softwares software.

11/12/2016: Brugere rapporterede, at nedenstående metoder også fungerer på Windows 7.
Årsag bag Windows 10-fejl 0xc0000005:
Der er en række kendte årsager, der forårsager, at denne fejl forstyrrer driften af forskellige software i Windows 10. En af de grunde, der betragtes som en hovedårsag, er et tredjeparts antivirusprogram, der forårsager konflikter med eksekverbare filer og påvirker deres handlinger. På den anden side kan registre blive ødelagt på grund af malware og vira, der får programmerne til at opføre sig unormalt. Nogle gange kan dårlige hardwaredrivere også være synderen, der forårsager denne fejl.
Løsninger til løsning af Windows 10-fejl 0xc0000005:
Baseret på ovennævnte grunde er løsningerne ligetil. Så gå gennem følgende metoder for at slippe af med denne frustrerende fejlmeddelelse.
Reparer korrupte systemfiler
Download og kør Restoro for at scanne og gendanne korrupte og manglende filer herfra , når du er færdig, fortsæt med nedenstående løsninger. Det er vigtigt at sikre, at alle systemfiler er intakte og ikke korrupte, inden du fortsætter med nedenstående løsninger.
Metode nr. 1: Fastsættelse af antivirusprogrammet
Antivirusprogrammer kan påvirke de eksekverbare filer i et antal programmer. Så for at løse dette problem skal du deaktivere tredjeparts antivirusprogram for at kontrollere, om det var synderen eller ej. Bemærk, at deaktivering af antivirusprogrammer kan resultere i nogle alvorlige trusler mod din computer, når du har forbindelse til internettet.
Du kan også stole på Windows 'egen sikkerhedssoftware, dvs. Windows Defender . Det har den samme funktionalitet som ethvert andet antivirusprogram. Du kan deaktivere antivirus ved at navigere til dets indstillinger og slukke for skjoldet.

Når den er deaktiveret, skal du kontrollere for fejlen igen. Hvis det stadig vedvarer, skal du gå til den næste metode.
Metode nr. 2: Fastsættelse af registre
Den indskrive er den centrale database af Windows, der konstant bliver brugt af din pc til hjælp den læser mange forskellige filer & indstillinger, som den har brug for at køre. Registre kan blive ødelagt på grund af skader på visse filer, der kræves for at stable alt på plads. Derfor anbefaler de fleste eksperter, at du sørger for at tage backup af dit registreringsdatabase og opbevare denne sikkerhedskopi på en konventionel USB-nøgle, så du muligvis kan genoplive dit registreringsdatabase i den tidligere tilstand i tilfælde af korruption. Men hvis du ikke sikkerhedskopierede dit registreringsdatabase, skal du følge disse trin for at rette registre for at løse fejlen 0xc0000005 .
1. Download software til registreringsdatabaseoprydning fra dette link .
2. Når det er downloadet, skal du installere det ved hjælp af de anbefalede indstillinger. Åbn softwaren, når installationsprocessen er afsluttet.
3. På grænsefladen skal du klikke på fanen Registrering i venstre rude og klikke på knappen mærket som Scan for Issues . Det begynder at søge efter fejl i registreringsdatabasen, og når søgningen er afsluttet, aktiveres en knap Fix Selected Issue . Klik på den knap, så bliver alt ordnet.

Metode nr. 3: Rettelse af defekte drivere
Drivere er softwareprogrammer, der hjælper computeren med at kommunikere med hardware, der er knyttet til den. Så når de er beskadiget, har hardwaren tendens til at forårsage fejl . At rette disse defekte dykkere kan hjælpe dig på en række måder. Følg nedenstående trin.
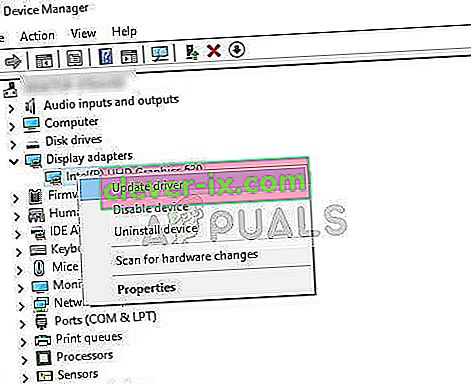
1. Åbn Enhedshåndtering ved at trykke på Win + X og vælge den på listen.
2. Rul ned i Enhedshåndtering for at se, om der er hardware med et gult mærke. Hvis der er, skal du højreklikke derovre og vælge Opdater driver software . Hvis du for nylig har installeret drivere, skal du også geninstallere disse drivere.

3. I vinduet, der vises efter, skal du klikke på Søg automatisk efter opdateret driversoftware for at lade det søge og installere drivere automatisk. Hvis, hvis du har downloadet driverne manuelt, skal du klikke på indstillingen nedenfor for at gennemse og installere dem. Når processen er færdig, skal du kontrollere for fejlen.

Metode nr. 4: Fix BCD
Denne metode skal udføres af brugerne på egen risiko. Dette fungerede for nogle og fungerede ikke for nogle. Du bliver også nødt til at genaktivere Windows efter at have udført trinene i denne vejledning.
- Hold Windows Key og Tryk på X . Vælg kommandoprompt (administrator)
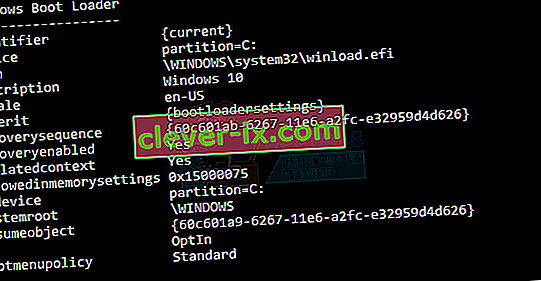
- Skriv “ bcdedit” og tryk på ENTER. Hvis din Windows Boot Loader-sti er xOsload.exe, skal du fjerne nogle filer og reparere din BCD. Du kan se dette i PATH-feltet, når du har udført kommandoen “ bcdedit”.
- Når du er færdig, skal du udføre følgende kommandoer nedenfor, nogle kan returnere ikke fundet, men ignorere fejlene og fortsæt til sidste. Sørg for, at du trykker på ENTER-tasten efter hver kommando.

Del D: \ Windows \ System32 \ xOsload.exe Del D: \ Windows \ System32 \ xNtKrnl.exe Del D: \ Windows \ System32 \ Drivere \ oem-drv64.sys attrib c: \ boot \ bcd -h -r -s ren c: \ boot \ bcd bcd.old bootrec / rebuildbcd
Metode 5: Kontrol af Windows-opdateringer
Windows-opdateringer indeholder ofte rettelser til nogle fejl og fejl, men de er også berygtede for at give plads til nye problemer på folks computere. I dette trin vil vi dog kontrollere, om der er opdateringer til dit operativsystem, fordi Microsoft ofte laver eventuelle problemer, der kommer fra deres opdateringer. For at gøre det skal du følge vejledningen nedenfor.
- Tryk på "Windows ' + " I "for at åbne Windows-indstillinger.
- I indstillingerne skal du klikke på "Opdateringer og sikkerhed" og fra venstre side vælge "Windows Update" .
- På det næste skærmbillede skal du klikke på "Kontroller for opdateringer" og det vil automatisk bede Windows om at kontrollere, om der er tilgængelige opdateringer.
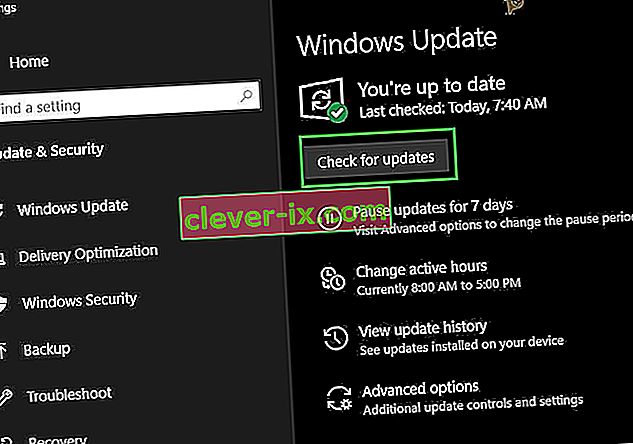
- Når opdateringskontrollen er gennemført, skal du klikke på knappen "Download" for at udløse download og installation af nye opdateringer på din computer.
- Når disse opdateringer er installeret, skal du kontrollere, om dette har løst problemet på din computer.


Metode 6: Gendannelse af computer
Hvis du lige er begyndt at få dette problem, bliver det muligvis udløst på grund af en defekt driverinstallation eller endda på grund af et useriøst program, som du muligvis har installeret på din computer for nylig. Derfor vil vi i dette trin vende computerens tilstand tilbage til en tidligere dato, og forhåbentlig skulle dette få vores problem løst, hvis det skyldtes de ovennævnte grunde. For at gøre dette:
- Tryk på "Windows" + "R" for at åbne kør-prompten.
- Indtast "rstrui" og tryk på "Enter" for at åbne vinduet til gendannelsesadministration.
- Klik på "Næste" og marker "Vis flere gendannelsespunkter" .
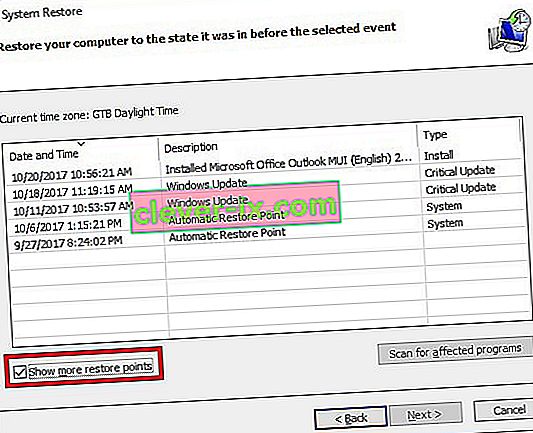
- Vælg et gendannelsespunkt fra listen, der ligger før den dato, hvor dette problem startede.
- Klik på "Næste" igen, og følg instruktionerne på skærmen for at vende alt tilbage til den valgte dato.
- Når gendannelsen er afsluttet, skal du kontrollere, om problemet stadig vedvarer.


Metode 7: Aktivér firewall
Det er muligt i nogle tilfælde, at fejlen udløses, fordi applikationen er mistænksom eller i det mindste, hvis den er blevet markeret som mistænkelig, og Windows Firewall ikke kører på din computer for at validere denne mistænkelige. Derfor vil vi i dette trin sørge for, at Windows Firewall er aktiveret for at slippe af med denne fejl. For det:
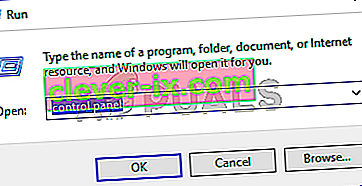
- Tryk på "Windows" + "R" for at åbne kør-prompten.
- Indtast "Kontrolpanel" og tryk på "Enter" for at starte den klassiske Kontrolpanel-grænseflade.
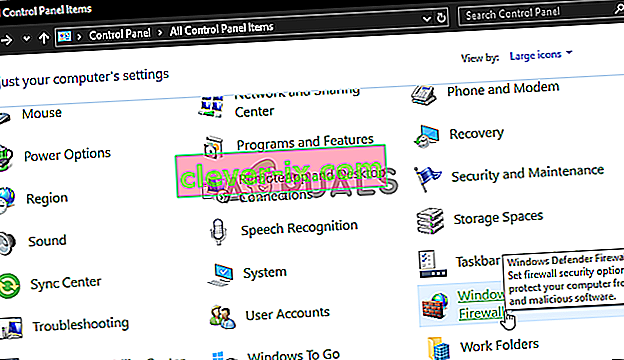
- I kontrolpanelet skal du klikke på "Vis efter:" og vælge knappen "Store ikoner" .
- Når du har foretaget dette valg, skal du klikke på "Windows Defender Firewall" for at starte Firewall og derefter vælge "Slå Windows Defender Firewall til eller fra".
- Sørg for at kontrollere "Tænd for Windows Defender Firewall" for begge de tilgængelige muligheder for at tænde Firewall.
- Når du har foretaget dette valg, skal du gemme dine ændringer og lukke ud af vinduet.
- Når du har gjort det, skal du kontrollere, om problemet stadig vedvarer.


Metode 8: Kør SFC Scan
I nogle situationer har du muligvis installeret en dårlig driver på din computer eller på et eller andet tidspunkt på grund af en lagringsfejl, kan nogle systemfiler eller drivere være beskadiget. Derfor kører vi i dette trin en komplet systemscanning for at identificere eventuelle drivere, der mangler signaturer eller for at rette op på abnormiteter i systemfilerne. For det:
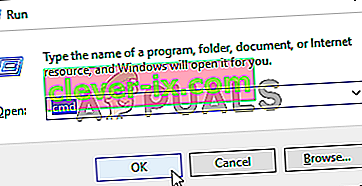
- Tryk på "Windows ' + " R "for at åbne Kør-prompt.
- Indtast "cmd", og tryk derefter på "Skift" + "Ctrl" + "Enter" for at give administratortilladelser. Kør kommandoprompten
- Indtast følgende kommando inde i kommandoprompten, og tryk på "Enter" for at udføre den.
sfc / scannow
- Let the computer scan for any broken or corrupted items and it should automatically replace them with working ones.
- Check to see if doing so fixes the error message.

Method 9: Disabling Data Execution Prevention
Data Execution Prevention is a program that prevents certain programs or executables from being able to run on your computer because it suspects that they might be viruses. Due to this prevention, sometimes, as a false alarm, legit applications might also face issues while trying to run on your computer. Therefore, in this step, we will be disabling this setting from the system configuration panel. For that:
- Press ‘Windows’ + “R’ to open the Run prompt.
- Type in “Control Panel” and press “Enter” to launch the classical control panel interface.

- Inside the Control Panel, click on the “View By:” icon and then select the “Large Icons” option.
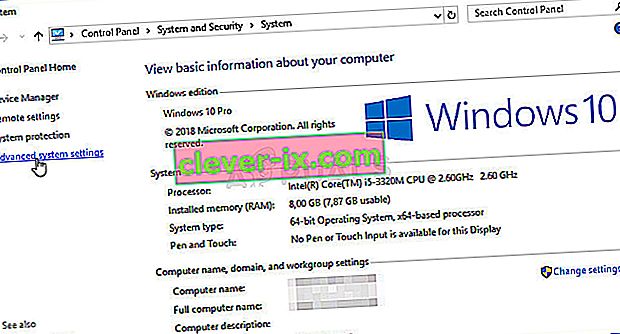
- After selecting Large Icons, select the “System” option.
- Click on the “Advanced System Settings” option on the left side of the screen.
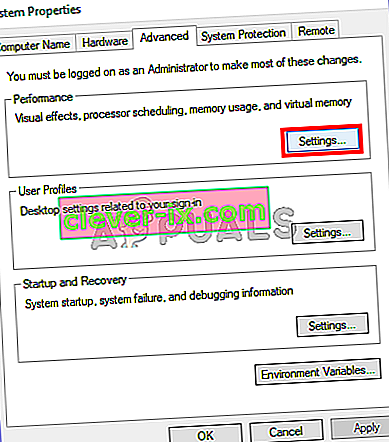
- In the advanced System Settings, click on the “Advanced” tab from the top.
- In the advanced tab, click on the “Settings” option under the “Performance” heading.
- On the next window that opens up, click on the “Data Execution Prevention” tab, and then select the “Turnon DEP for all programs except thoseI Select” option.
- After that, click on the “Add” option and point to the executable of the application that you are facing issues with.
- This way, that application will no longer come under the jurisdiction of the DEP program.
- Check to see if doing so has fixed the issue.


If the above process is unable to fix the issue, it might be because the executable isn’t the only one being affected by the DEP program. Sometimes the DEP might actually be preventing a herd of executables from being run on the computer and to counter this we will be disabling DEP completely.
Disabling DEP completely cannot be done through any Windows setting and it needs to be done manually through the command prompt. Remember to take this step as a last resort because this can in some cases makes your computer more vulnerable to viruses and malware attacks. In order to disable DEP through the command prompt:
- Press “Windows” + “R’ to open the Run prompt.
- Inside the Run prompt, type in “cmd” and then press “Shift” + “Ctrl” + “Enter” to launch in admin mode.
- Inside the command prompt, type in the following command and press “Enter” to execute it on your computer.
bcdedit.exe /set {current} nx AlwaysOff - Once the command has been executed, run the application that you want to and check to see if the error message still persists.
Method 10: Disable Firewall and Windows Defender
In some situations, the executable that you want to run on the computer might actually be blocked by the Firewall and it would not be able to make contact with its servers this way. Therefore, we will have to allow the executable in our Firewall for both public and private networks which should get it working if the Firewall is preventing it.
In addition to that, sometimes the Windows Defender might prevent the application from running on your computer because its local files might be suspicious and not properly signed. This can be due to a false alarm as well so we will be disabling the Windows Defender for the application as well by adding an exclusion. In order to do that:
- Press “Windows” + “R” to launch the Run prompt.
- Type in “ControlPanel” and press “Enter” to launch the classical control panel interface.
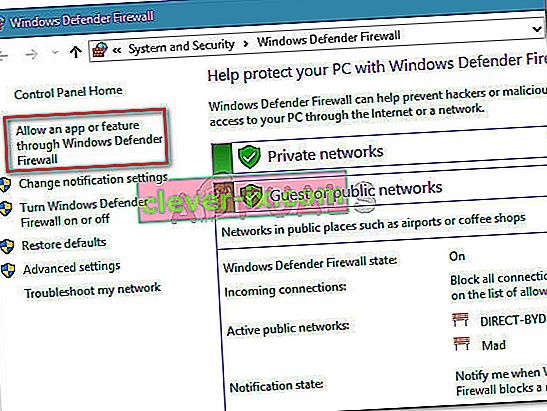
- Click on the “View by:” button, select “Large Icons” and then click on the Windows Defender Firewall option.
- Select the “Allow an app orfeature through the Firewall” button on the left pane and then click on the “Change Settings” button and accept the prompt.
- From here, make sure that you check both the “Public” and the “Private” options for the application and its entries.
- Save your changes and exit out of the window.
- After that, press “Windows” + “I” to launch the settings and click on the “Updateand Security” option.

- From the left pane, click on the “Windows Security” button and then click on the “Virus and Threat Protection” button.
- Select the “Manage Settings” button under the Virus and Threat Protection Settings heading.
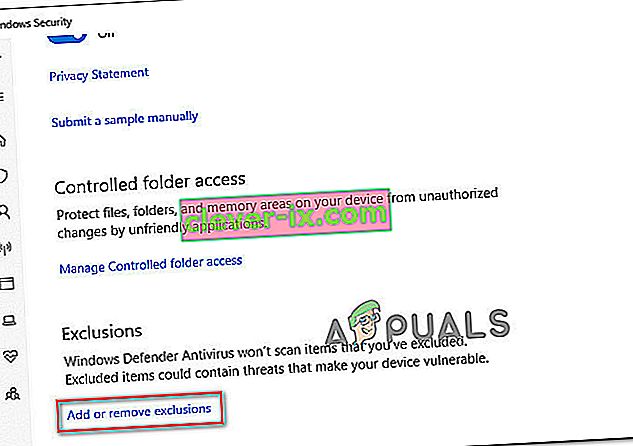
- Scroll down and click on the “Add or Remove Exclusions” button in the next window.
- Click on the “Add an Exclusion” option and select “Folder’ from the File type.
- Make sure to specify the application’s folder with which the issue is occurring and exit out of this window after saving your changes
- Check and see if doing so has fixed the error message.


Method 11: Reinstall Firefox
If you are getting this error while trying to launch Firefox, it might be occurring because the applications haven’t been installed properly on your computer. Therefore, in this step, we will be launching the app management window and uninstalling Firefox after which we will reinstall it completely by downloading it from the Firefox website. For that:
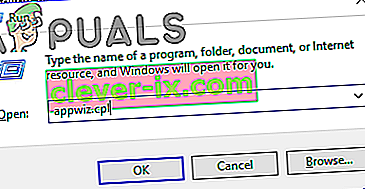
- Press “Windows” + “R” to open the Run prompt.
- Type in “appwiz.cpl” and press “Enter” to open the app management window.
- In the app management window, scroll down and right-click on the “Firefox” application.
- Select “Uninstall” from the list and then follow the on-screen instructions to remove the software from your computer.
- Repeat this step for all instances and bundled applications of the software installed on your computer.
- Make sure to disable any third-party antiviruses at this point to make sure that the software is installed smoothly.
- Head on over to the Mozilla website and click on the download button.

- Click on the downloaded executable and install it on your computer following the on-screen instructions.
- Check to see if doing so has fixed the error message on your computer.


Method 12: Scanning for Malware
It is possible in some cases that the computer has acquired malware that is preventing the user from being able to run all the system functions on their computer. Therefore, in this step, we will be using the default Windows Defender to scan our computer thoroughly for any viruses or malware that might’ve found its way on our computer. For that:
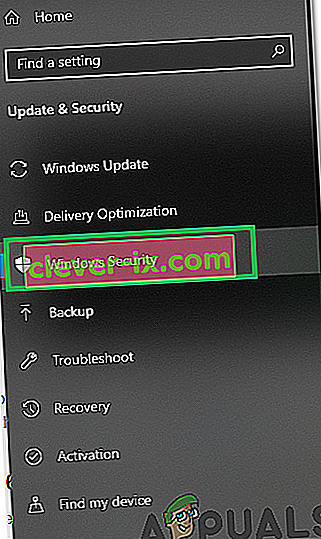
- Press the “Windows” + “I” keys simultaneously on your PC to open the Settings tab.
- Navigate to the Update& Security option and then click on the “Windows Security” button on the left tab.
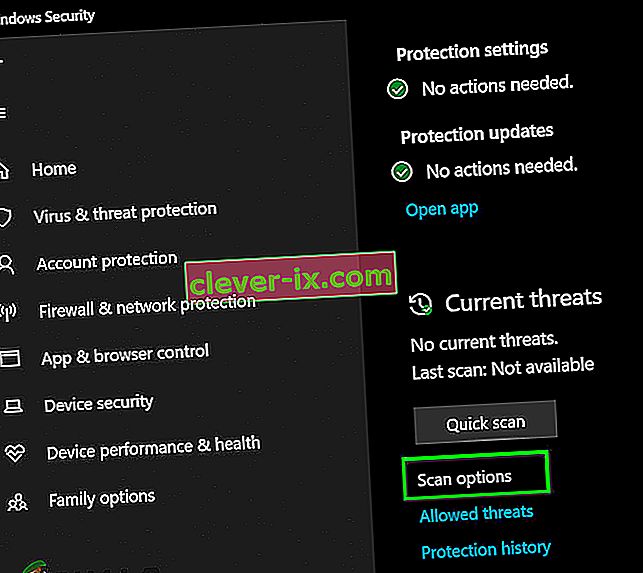
- After that, click on the “Open Windows Security” and select the “Virus and Threat Protection” option.
- After that, click on the “Scan Options” button below the “Quick Scan” window.
- Click on the “Full Scan” option and then hit the button of “Scan Now”.
- Wait for a few seconds while this process gets completed and then finally check if the error gets resolved now.


Microsoft Security Scanner is an additional tool that you can use to test the system for any further viruses and malware because sometimes the default tool isn’t able to perform the scan properly. Therefore, in this step, if the issue still hasn’t been resolved, we will be using the Microsoft Security Scanner to further make sure for any issues.
- Launch your browser and download the Microsoft Security Scanner from here.
- After downloading the executable, run it on your computer and let it install.
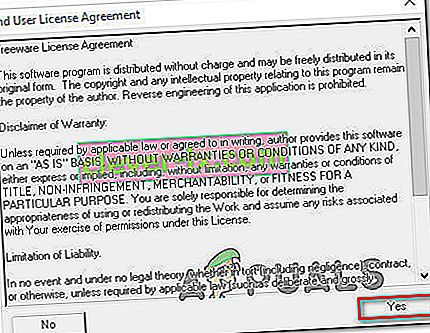
- Accept the License Agreement terms and click on “Next”.
- Select “Full Scan” and click on “Next”.
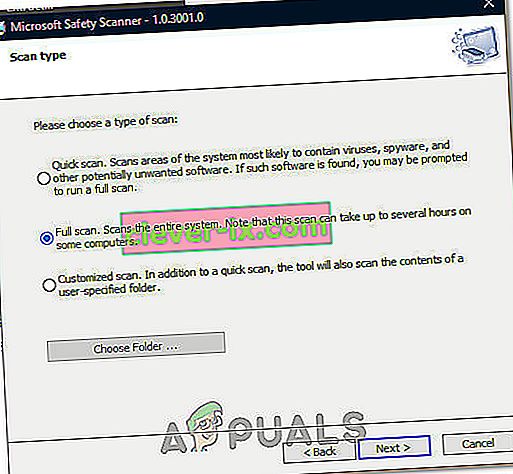
- After you opt for a full scan, the software will start scanning your entire computer to look for any malware or viruses that might’ve disguised themselves as normal executables or applications.
- After this scan has been finished, check to see if the error message still persists.


Method 13: Install Missing Drivers
It is possible in some situations that your device is missing certain drivers due to which this particular issue is being triggered on your computer. Therefore, we will be checking for any missing drivers and then we will check to see if the error is fixed. In order to do this, follow the guide below.
- Download Driver Easy on your computer.

- Run the downloaded executable and install the software on your computer.
- Run the check and see if there are any missing drivers on your computer.
- Install these missing drivers and then install them either manually or automatically using the Software.
- After installing all the missing drivers, check to see if the issue still persists.

Method 14: Reconfigure Registry
It is possible that in some cases, you haven’t properly configured all the registry settings or that you unknowingly configured something incorrectly. Therefore, in this step, we will be reconfiguring our Registry to fix a certain key that sometimes, if misconfigured, causes this particular error on Windows. In order to do this, follow the guide below.
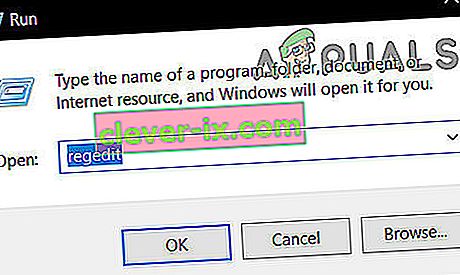
- Press “Windows” + “R” to open the Run prompt.
- Type in “regedit” and press “enter” to launch the registry editor.
- Inside the registry editor, navigate to the following location.
HKLM\SOFTWARE\Microsoft\Windows NT\CurrentVersion\Windows\AppInit_Dlls
- Double click on the “LoadAppInit_DLLs” entry on the right side of the screen.

- Change the value of this registry from “1” to “0”.
- Save your changes and exit the registry editor.
- Check to see if doing so has fixed the error.


Method 15: Update Disk Drivers
In some cases, the Disk Drivers that are being used to control your Storage and other Disks installed on the computer might have been outdated due to which the error is being triggered. Therefore, in this step, we will first be opening the Device Management Window and from there, we will be updating these drivers. In order to do so, follow the steps mentioned below.
- Press “Windows’ + “R” to open the Run prompt.
- Type in “Devmgmt.msc” and press “Enter” to launch the device management window.

- In the Device Manager, double click on the “DiskDrives” option to expand it.
- Right-click on the storage device listed and select the “Update Driver” option.
- Select the “Search Automatically for Drivers” option and let the setup search.
- If there are any drivers available, Windows will automatically check for them and install them on your computer.
- Check to see if doing so has fixed the issue.


Method 16: Disabling Automatic Updates and Uninstalling Updates
It is possible in some cases, that this error is stemming from a faulty update install. Microsoft is notorious for pushing out updates that aren’t properly customized to work for all hardware combinations and often go on to break things instead of making them better. Therefore we will make sure that the recent update isn’t installed on our computer.
In order to do this, we will have to first disable automatic updates on our computer and then we will be uninstalling the recently installed updates. Make sure to back up any important data that you don’t want to lose just in case this goes bad.
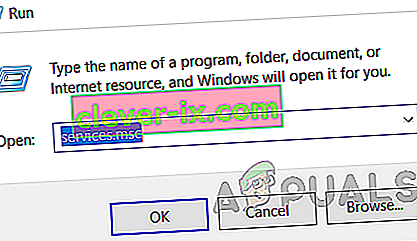
- Press “Windows” + “R’ to open the Run prompt.
- Type in “service.msc” and press “Enter”.
- Scroll through the list and double click on the “Windows Update” service.
- Click on the “Stop” button and then click on the “Startup Type” dropdown.
- Select “Disabled” from the list and select the “Apply” button from the window.
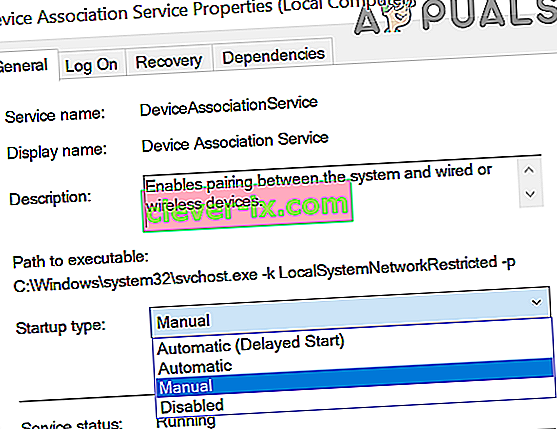
- Click on “OK” to close out of this window.
- Check to see if doing so has stopped your computer from updating.


After stopping the computer from updating, we will now be uninstalling the recent updates that have been installed on your computer. For that:
- Press “Windows” + “I” buttons to open the settings.
- In settings, click on the “Update and Security” option and then select the “Windows Update” button from the left pane.

- In the Windows Update, click on the “View Update History” option.
- In the Update History, click on the “Uninstall Updates” option and it should take you to the uninstallation screen where all the recently installed updates will be listed.
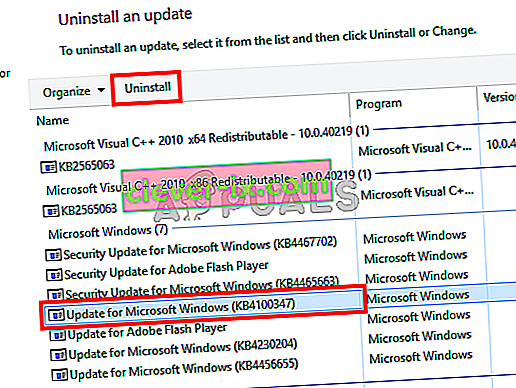
- From the list, right-click on the update that was installed recently and caused this error on your computer.
- Right-click on this update and select the “Uninstall” button to remove it completely from the computer.
- Follow through with the on-screen instructions.
- Check to see if uninstalling has fixed this issue.


Additional Fixes:
- In addition to some of the recommendations given above, you should try to check if there are any bad memory modules (RAM) installed on your computer which can be a cause of this.
- Sørg også for at kontrollere, om du ikke har overclocked din RAM til et niveau, der overstiger den anbefalede grænse. Hvis du har gjort det, skal du prøve at bringe det tilbage til fabriksindstillingerne og kontrollere, om det løser dit problem ..


