One of the most common errors that the Android Operating System is plagued by is the “com.android.systemui has stopped” error, an error in which the entire User Interface of a device stops responding, sometimes for as long as an hour.

This error can be caused by anything from a faulty custom ROM installation to a deleted OS file or a third-party app. In most cases, it is a third-party app. A Couple of users have reported issues with the Firefox app causing this.
Following are the most effective methods that can be used to solve this problem:
Method 1: Download and Run CM Security
- Many users from the comments on this post suggested that running CM Security fixed the issue for them.
- Go to the Play Store and Search for CM Security or click (here)
- Install the CM Security App and Run it
- Scan with it and the issue should be resolved.
Method 2: Wipe the device’s cache partition
Sometimes, wiping the cache partition on your device can fix this particular issue. In order to do that, follow the steps below.
- Switch the device off.
- Boot the device into Recovery Mode (which, on most devices, is done by pressing and holding the Power, Volume Up and Home buttons simultaneously).
- Once the device has entered Recovery Mode, use the Volume Rocker to highlight the “Wipe Cache Partition” option.
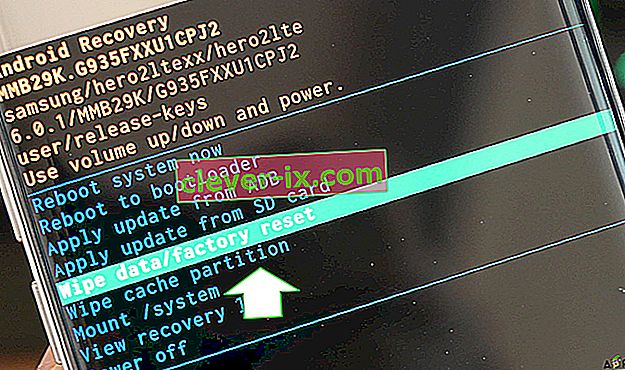
- Press the Power Button to confirm the selection.
- Wait for the device to successfully wipe its cache, and then reboot the device.

Method 3: Get rid of any third-party apps that might be responsible
First and foremost, make sure that the “com.android.systemui has stopped” error is indeed being caused by a third-party app by booting the device into Safe Mode and using it for a while to make sure that the error doesn’t pop up.
Browse through the apps on the device to determine what app gave rise to the issue. This basically means that the culprit is the app after the installation of which the issue was born.
Get rid of any and all apps that you find to be suspicious and boot out of the Safe mode, and in the event that there is more than one suspect, reinstall the deleted apps one by one to determine what app is the actual culprit.
Method 4: Reinstall or change the device’s ROM (for rooted users)
If the device is rooted and a custom ROM has been installed onto it, the problem might be the fact that the device’s data and cache were not appropriately wiped after the installation of the ROM.
If that is the case, all the user needs to do is reinstall the ROM or switch to a completely new one, making sure that they remember to wipe the device’s data and cache partition this time.
Method 5: Uninstalling Google Updates
In some cases, the Google Updates installed after connecting the phone to an internet connection might’ve been the culprit behind this error. Actually, the updates might not be entirely compatible with your Android operating system due to which this error is being triggered. In order to uninstall these updates:
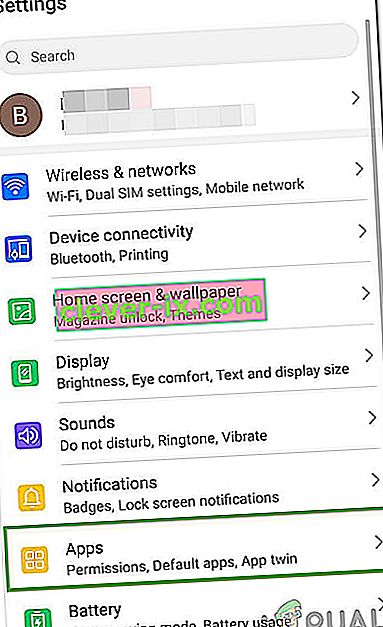
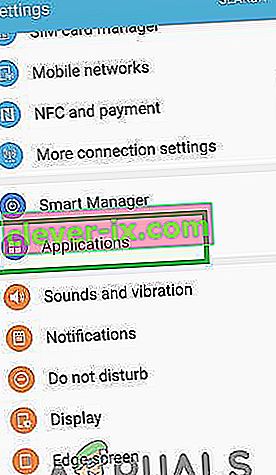
- Drag down the notifications panel and select the “Settings” option.
- Click on the “applications” button in settings and then select the “Apps” button.

- Click on the “Three Dots” in the top right corner and select “Show System Apps”.
- Scroll down the list of applications and tap on the “Google App” option.
- Click on the “Uninstall Updates” button to uninstall all installed updates for the Google App.

- Confirm any on-screen prompts and wait for the uninstallation to be completed.
- Check and see if the error persists after uninstalling Google Updates.


Method 6: Clearing Cache/Data
It is also possible that particular cache storage on your phone has been corrupted due to which this issue is being triggered when Google PlayStore tries to launch using that corrupted cache. Therefore, we will be clearing it in this step. For that:
- Tap on the “Settings” option from your home screen to get into the settings.
- Click on the “Applications” option and then select the “Apps” button to launch the application management panel.
- In this panel, click on the “Three Dots” at the top right and select “Show System Apps” from the list.
- In the system apps, scroll down and click on the “Google PlayStore” option.
- Click on the “Storage” option and then click on the “Clear Cache” button.
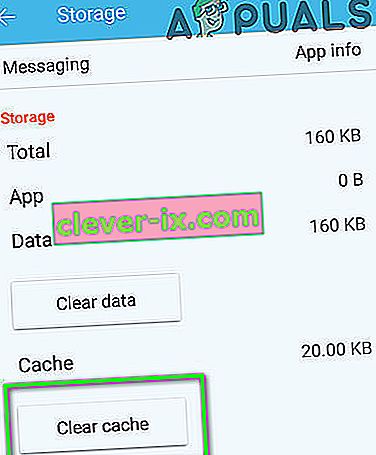
- Wait for some time and then click on the “Clear Data” button.
- Confirm any on-screen prompts during this period and check if the issue still persists.


Method 7: Disabling Auto-Updates
In certain situations, the auto-updates being queued by the Play Store might be causing this issue on your phone. Therefore, in this step, we will be disabling these auto-updates from being triggered on your mobile. In order to do that:
- Tap on the Google play store icon on your home screen or app drawer to launch the Play Store.
- In the Play Store, Click on the “Menu” button and select “Settings”.
- In settings, under the general window, click on the “Auto-Update Apps” option.
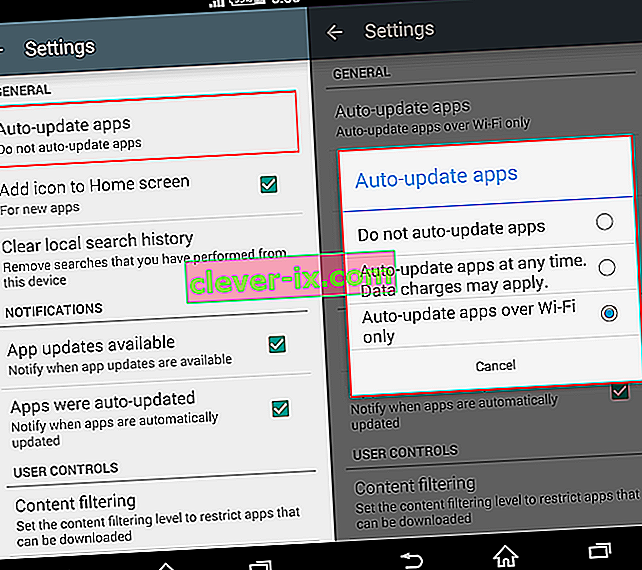
- Select the “Do not auto-update apps” option from the next screen and click on “OK”.
- Check and see if doing so fixes the issue on your mobile.

Method 8: Disable Auto-Start Management
Some applications on your mobile are given permission to be able to Auto-start at their own discretion. While this can be a useful feature in some cases, in others, it is a security breach due to device threats. Therefore, in this step, we will be disabling this feature temporarily and then check if doing so fixes the issue with your Android smartphone.
- Drag down the notifications panel and click on the ‘settings’ option.

- In settings, scroll down and select the ‘security’ button and then click on the ‘auto-start management’ entry.
- In the Auto-start Management, some apps should be listed with tick marks in front of their names.

- Uncheck the option for all the applications in the list and save your changes if the option is given.
- Check and see if doing so fixes the issue for your Android.


Method 9: Clearing System Interface Cache
There is a system interface process among the background processes and it is a very important background process as it adds a lot of interface functionality to your device. However, if it acquires corrupted cache, it can stop functioning properly which can end up triggering this issue. In order to fix this error, we will have to clear its cache. For that:
- Tap on the “Settings” option from your home screen to get into the settings.
- Click on the “Applications” option and then select the “Apps” button to launch the application management panel.
- In this panel, click on the “Three Dots” at the top right and select “Show System Apps” from the list.
- In the system apps window, select the “System Interface” entry and select the “Storage” option.
- Click on the “Clear Cache” and the “Clear Data” button and wait for both of them to be cleared.
- Check and see if the error message is fixed after doing so.
Method 10: Allowing System UI to Draw on TOP
It is possible that due to a potential permissions reset, the System UI process has lost the permissions to draw on top of other applications due to which it is facing this particular issue. In order to fix this, we will be giving it back its permissions which should get rid of the issue. For that:
- Tap on “Settings” from your home screen or app drawer.
- Click on “Applications” and then on the “Applications Manager”.
- Click on the “Three Dots” at the top right and then select “Apps that can appear at Top”.
- Click on the “Three Dots” again and select the “Show System Apps” option.
- Click on “System UI” from the list and change its permission from off to ON.
- This should fix the issue, make sure to check if the error pops up again.

Workarounds:
- From the PlayStore, install any launcher such as the Nova Launcher.
- Try to Factory Reset your Device as a last resort.


